Friday, December 30, 2011

Layout Overview Video

   Here's the layout overview video I promised that I hope gives everyone an idea of the entire layout.  Its not my best cinematography.  Try not to get too dizzy watching. :)  But, I think it does accomplish its goal of giving the viewer a good idea of what the complete layout entails.  I'm also posting a track plan that you can follow.  I hope this will inspire you to come up with some good blog names.  Thanks also for supporting our advertisers!!!


Email Subscribers also Eligible / First Contest Entry

   I realize that a number of you follow the blog through email subscription (see widget on lower left side) rather than being an official follower. I just wanted to clarify that email subscribers are also eligible to submit a blog name for the B23-7 Giveaway.  Also, we have our first official blog name entry, "Excellence in Miniature."

Wednesday, December 28, 2011

Name that Blog - Atlas B23-7 Giveaway

   Let's ring in the New Year with another locomotive giveaway! This time its an Atlas GE B23-7.  While the loco is 10+ years old, it still runs well.   However, the new owner may want to give it a thorough cleaning, new brushes, etc.
   You can win this loco by helping me rename this blog.  My sister-in-law (Thanks Kate!!)  mentioned to me over the holidays that I needed to give my blog a catchy, more descriptive name in order to drive more visits to the blog and, of course, generate more revenue through ad clicks (support of the blog advertisers is appreciated).  While "UPRR Geneva Subdivision" means something to me and to some model railroad enthusiast, the casual blog surfer has no idea what the blog is about.  So, I am looking for a catchy blog name that will generate interest and will communicate that the blog is about a high quality n scale model train layout.
   The contest will have two parts.  The first part will be submission of new blog names.  Only blog names submitted by blog followers will be considered.  So, to be in the contest, you will need to be registered as a follower of my blog and then submit your blog name through a comment to this post or any subsequent post.  You are not limited in the number of blog names you can submit.
   The second part will be voting for the new blog name.  I will select my favorite five submitted blog names and then everyone will be able to vote for their favorite name.  You will not have to be a follower to vote and you can vote multiple times, but no more than once per day.
   Of course, the winner of the Atlas GE B23-7 will be whoever submitted the winning blog name.  They will also win the satisfaction that they named the best N scale blog on the web, which we all know is worth much more than a locomotive :)
   I'm not sure how long each part will last, but I am thinking a couple of weeks for each.  I will post when each part will end a couple of days beforehand so any last minute submissions or votes can be made.
   I will be posting a video of the overall layout to inform and inspire you. I hope this contest is a lot of fun for everyone and helps give the blog a great name.  Please feel feel to let others on the web know about the contest, the more participants the better!
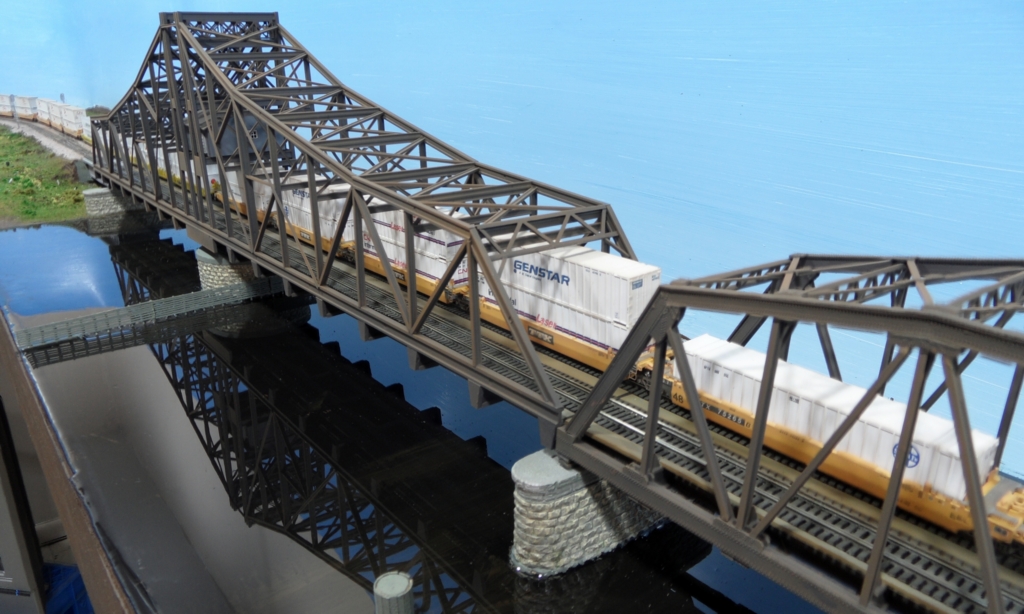
  Here's the loco.  The contest starts now!

Friday, December 23, 2011

Shore Detail, UP Bridge Shop & Thomas & Betts

   I'm almost much done with the Mississippi River/Clinton area of the layout. I added ladders to the shore area, added a paved road across the tracks for access to Thomas & Betts, put in a gravel road, weathered the roadways & parking lots, put in some background buildings, planted some telephone poles and added a few people.  The background buildings are from an old Heljan slaughterhouse kit that is now on its fourth layout.  I've gotten my money's worth out of that one!  Only thing left to do is add some static grass and put a background picture where the road ends at the backdrop.  I will hopefully get to the static grass next week but won't get to the background picture until things get green again in the spring and I can take an appropriate picture somewhere.
   The next areas of the layout I am going to tackle are the Proviso warehouses and ballasting the Proviso Yard.  I may try to get to the prototype Proviso Yard next week and get some pictures but I won't be able to begin construction until after Christmas break.  If I have time I may also try to weather some engines and the BLMA spine cars during break; maybe even one more video.  Stay tuned.


Tuesday, December 20, 2011

I'm Getting in the Christmas Spirit!!!

Being an educator in a Christian school, I never find it hard to get into the Christmas spirit each year.  With Christmas programs, decorations, faculty devotions, religion class lessons, etc. its hard not to feel the Christmas cheer.  Today is our last school day before Christmas break and we just sang Christmas songs as part of the chapel service I led.  The children are now watching movies and having parties between lessons the teacher's are trying to still fit into the day (this is school after all!).  This afternoon I'll be at the bowling alley with the 5th through 8th grade students and then Christmas break officially begins at 3:00 p.m.

I thought I would share a little Christmas spirit with all of you by uploading a short video I shot last night. I'll probably post a few more items over the next couple of weeks as I'll have some time to work on the layout. 

I hope all of you have a great Christmas and a wonderful new year.

Sunday, December 18, 2011

More Progress on Thomas & Betts

   I used my airbrush to apply Floquil reefer white and Floquil earth to the Thomas and Betts plant in Clinton, IA. Also added doors windows, vents and roof detail.  I am in search of a good source of a large rooftop air conditioner to complete the project. I got a bunch of nice details a while back from a company that only sold via their website, but I can't remember their name.  They had air conditioners, dumpsters, air vents, wood crates, pallets and more.  If you have any ideas, let me know.  I also put in the parking lot, gravel lot and put ballast on the spur track.  A few vehicles and other details were also added.


   While I was putting in the parking lot, I decided to put in a road to the bridge shops that are right next to the western exit of the rotating bridge.  The shops are for maintaining and operating the bridge.  The two buildings do not match the prototype structures, but they will do for now. In fact, I probably won't get back to scratch building the correct prototypes until after a whole lot of other project s are completed on the layout.  I also did some work on the riverbank area.  I included below some prototype pics for reference.
   Sometime during Christmas break I plan to weather the road and add static grass around the area.


Monday, December 12, 2011

Thomas & Betts ready for Painting

I'm ready to paint the Thomas & Betts plant.  Since the last post, I completed the roofing on all three structures, added the vertical storage storage tanks, added the passageway between the two tall towers and built the small roof access structure to one of the roofs.  I will still need to add the large air conditioner as well as other assorted details.  I made the storage tanks out of 1" PVC pipe.  Once the building are painted, I will install the windows and doors.


Thursday, December 8, 2011

Thomas & Betts

While I may still come back to the Mississippi River for some tweaking, I have decided to move on and tackle the Thomas & Betts plant right next to the bridge.  On Black Friday, while Patti was shopping, I took a trip to Clinton  IA to snap some pictures of the plant and, of course, some more of the bridge.  Below is a couple of pictures of the facility.  My favorite, by the way, is the third one taken while standing under the bridge.


It appears that the taller white buildings are the original structures while the Morton style structure was added on later.  While the Morton building occupies much more square footage than the original structures, the original are much more visible due to their height.  I do not have near enough space for the entire facility, so I opted to include the original white structures only somewhat downsized, but greatly reducing the size of the Morton style structure.  I used Evergreen styrene .060 sheet and .020X.100 strips for the main structure along with Grant Line windows.  For the Morton building I used a modified Pikestuff engine facility kit.  I'll post more pictures as I complete the plant.


Sunday, October 30, 2011

Mississippi River Bridge - Finishing Touch

Final piece of the Mississippi River bridge is the stairway up to the control house which I did this afternoon. I've been putting together an article about the contruction of the bridge. Which magazine should I submit it to; Model Railroader, N Scale Railroading or N Scale? I'm leaning toward N scale Model Railroading, have not decided for sure.


Sunday, October 16, 2011

FIRE!!! (almost)

Last week there was burning odor in the basement that I could not identify. It had an electrical burn smell that was pretty strong. When I went into the Franklin Grove / Rochelle room the smell was even stronger. I checked the entire layout, especially the underside, but could not find the source. I even had my wife, who has a very strong sense of smell, come down and check, but she could not find it either. I finally concluded that it must be one of the florescent light ballast burning out so I turned off the lights and the layout to see if the smell would go away. After a couple of hours the smell did decline and then eventually went away altogether. I still used the layout over the past few days, but never more than an hour or so and the smell stayed away. I figured the lights needed to be on for a few hours before the burning would begin again. Yesterday, I was running the BNSF switcher in Rochelle when I needed to move some auto-racks from the BNSF tracks that I had hastily put there when the BLMA spine cars came in and I needed a train to put them on. This is what I found under one of the auto-racks. Looks like I did not put the auto-racks on the track correctly and one of the wheels shorted out the turnout. You can't see this from the picture, but the insulated wheel closest to the short was melted off the axle. What I can't figure out is why the short did not trip the PM42 power manager which was set to trip at @ 3.5 amps. Even with all the soot, the turnout frog passes the "quarter" test. Anyway, I set the PM42's to trip @ 1.5 amps. This new setting may cause a problem during operating sessions. We'll see. The auto-rack actually looks kinda cool. Might just keep it that way.

Friday, October 14, 2011

Newest Model Railroad

Our daughter Kelly and her husband Dan are proad parents of Patti and my third gradechild and the newest model railroader Zayden Daniel Avicola. He's quite adorable as you can see!

Thursday, October 13, 2011

One More Mississippi River Video

Okay, this is the last Mississippi River post for a while.  I need to move on to other areas of the layout.  I think I am obsessing on this project!

Tuesday, October 11, 2011

Mississippi River Bridge Progress - Backdrop

Just a few quick pictures of the bridge with the photo backdrop of the Highway 30 bridge.  The first picture is the prototype, of course.


Monday, October 10, 2011

Mississippi River Bridge - Looks Better with Track and Trains!

Added guard rails and painted the bridge track.  Looks better with the trains rolling!!!


Sunday, October 9, 2011

Mississippi River Bridge Weathering and Water

I am so close to being done with this project!  Yesterday I painted the waterbed, installed the barge fence & protective pylons, weathered the bridge piers, applied a coat of Envirotex gloss finish and airbrushed the bridges with layer of rust.  Today I plan to put guardrails on the bridge track, paint them and install.  That will pretty much complete the project although I will still need to put the stairwell on leading up to the control house and I need to do something to add ripples to the water.  Its way to reflective!

I post more pictures later today or tomorrow with the bridge tracks installed and trains!


Thursday, October 6, 2011

Mississippi River Bridge Close Up

Just added the final pieces to the rotating bridge before weathering takes place this weekend. The final pieces are the two end braces. I made these out of Plastruct 1/2" open web trusses. At the very beginning of the video you can see the braces. I also installed walkways in the two smaller bridges and painted all the walkways grey. The video has some good close up shots of the structure of the bridges.

Next up I will remove the bridges one more time so that I can paint and clear coat the waterway, add guard rails to the track and paint the track. I hope to get this all done this weekend.

Monday, October 3, 2011

Mississippi River Bridge Interior Walkways and Painting

I was really excited to see the prototype video in my last post.  Until I realized that the bridges have interior features that I could not ignore.  The bridges have walkways both between the tracks and outside each track.  Looking at my photos, I guess I should have know this as a few shots definitely show the walkways.  But it was the video that convinced me that I needed to add the walkways to my bridges.  So, after doing some measuring and some calculations, I determined that .060"X.250" styrene strips would do the trick.  Once I had the strips installed I airbrushed the entire bridge Floquil weathered black.  I think I need to go back yet and paint the walkways a dark grey to match the prototype and stand out more.  Once I get the walkways installed in the other two bridges, I will give all three a moderate air brushing of Floquil rust.   In addition to being more prototypical and looking good, the walkways make making sure the track is in straight very easy.

I also included a video update.


Thursday, September 29, 2011

Great Prototype Video for the Mississippi River Bridges

I ran across this great prototype video taken from the cab of a maintence truck crossing the Mississipp River.  Its very cool and extremely helpful since it shows the westbound signals at the approach to the rotating bridge.  These signal are normally impossible to see due to the tree cover and no road access.  This is the first time i've seen them.  I had assumed that they were similar to the east bound signals.  Its good to see that I was right!

Sunday, September 25, 2011

Mississippi Bridge Video

I'm not quite done yet, but I thought a video would be appropriate at this time.  The video give a closer idea of what the finished scene will look like when complete.

Here's a list of things yet to be done, in order.
1. Complete diagonal bracing on the backdrop side of the bridge.
2. Complete bracing on the ends of the bridge.
3. Paint the bridge and weather all three bridges.
4. Remove bottom two rows of stonework on the round pier.
5. Paint piers and glue in place.
6. Paint river bottom and apply clear epoxy finish.
7. Add code 40 guard rails to bridge track.
8. Pain bridge track
9. Re-install bridges.
10. Install Highway 30 photo backdrop.

I guess I'm not as finished as I thought.

Sunday, September 18, 2011

More Support Sections Completed for Mississippi River Rotating Bridge

While watching my two favorite NFL teams, the Bears and the Chiefs, lose on TV, I completed five more support sections for the Mississippi River rotating bridge.  I now have eleven out of fourteen support sections done.  I would have done all of them, but I ran out of 1/16" and 3/32" I-Beams that are used for diagonal bracing.  Its starting to look more and more like a bridge!  Once I get the bridge completely assembled I will remove it from the layout for painting with my airbrush.  I will need to remove the control house during the painting, so I did not glue the support section immediately to the right of the main center support sections that hold the control house.  This will allow for the removal of the house.  While the bridge is removed, I will remove the other two bridges and work on the piers and water.  I still need to reduce the height of the round pier and paint all of them.  Before the bridges are re-installed, I will need to work on the bridge track.  The bridge track will need code 40 guard rails installed and will also need to be painted.  Once all that is done, I re-install the bridges and turn my attention to the photo backdrop of the Highway 30 bridge.  If I'm lucky, I'll get it all done by Thanksgiving.


Saturday, September 17, 2011

Control House for Mississippi River Rotating Bridge

Spent sometime building the control house for the rotating bridge.  Used sheet styrene, paint and grant line windows for the structure.