Tuesday, June 29, 2010

Abutments!!

Okay, abutments are not that exciting.  However, they are very important to the start of any bridge.  These are for the highway bridge across the Rock River just west of Franklin Grove.  I built them "to fit" out of scrap pieces of styrene.  After painting them a concrete color, I'll be ready to fit the I beams to determine the exact height needed for the two piers that will go in the river.


Saturday, June 26, 2010

Train Meet at Global III

Just a quick video of some action at the just installed signals controlling a crossover and the west entrance to the Global III Intermodal yard. The stack train approaches from the west but must wait for a westbound coal train before it can enter the Globl II yard.  I'll post some pictures tomorrow of the scenery and signal progress if possible.

Wednesday, June 23, 2010

More Screen Wire Ground Form

While I planned to do more work on the Rock river area, I decided instead to do more screen wire work just east of Franklin Grove. The Rock River area has to wait since needed supplies were not in hand as of yet. It sucks having the closest hobby shop 40 miles away. Anyway, not wanting to waste available work time, I am pressing on with the screen wire. This is the area between Franklin Grove and Rochelle Global III.  The third track that has a couple of small B truck units is the drill track for the Global III yard.  The are will eventually have a farm with corn and soybean fields. 


Monday, June 21, 2010

Signals!!!

The first set of signals is installed and "working."  Below is a short video of the Franklin Grove signals in operation.  As you will see, there is still a bit of work to be done on the logic.  Only they track 2 (left) signal should turn yellow when the turnout is thrown for the coal train, not both of them.  Anyway, once I get that fixed, the signals ar egood to go.  The signals are by Sunrise, the se8c from digitrax is the signal driver and I use RR&Co software for the logic control. 

Friday, June 18, 2010

Informal Op Session

I was delighted to have special vistitors to the Geneva Subdivision last monday afternoon.  Long time friend, Pat Lana, visited from Colorado along with Tony Bowen, Allen Merta and Kent Charles.  After touring the layout for a while, we decided to do an informal operating session.  Over about 2 and 1/2 hours we ran 9 trains ( full session has 17 trains, along with yard work in Proviso and Global III) and had a great time.  Below are a few photos and videos.  Enjoy!


Tuesday, June 15, 2010

The Ol' Mirror Under the Highway Bridge Trick

What's a good way to diguise a river that runs into the backdrop? Put a mirror under a highway bridge, of course. Just as I did on the Rochelle Subdivisio, I am using this old trick on the Rock River crossing area. I went to a local interior design store and had them cut a 20" X 4" mirror that I carefully placed between the backdrop and benchwork where the river ends. The mirror does a great job of making it appear that the river continues on past the backdrop. The highway bridge, my next project, will cover the top of the mirror. I decided to wait with the epoxy pour for the river until after the highway bridge, with piers in the water, was installed. This will make sure that the highway piers appear to be in the water and not on top of the water. I ordered a bunch of Plastruct and Evergreen styrene sheets, strips and I-Beams for contruction of the highway bridge. Should be able to get to work on it sometime next week.

Wednesday, June 9, 2010

Trains Roll across the Rock River

The layout is back in action!  After being down for construction for five days, trains roll once again on the N scale UPRR Geneva Subdivision.  I still plan to install the mirror and pour the river this weekend.  But, other than that I'm going to take a break and just run trains for a while.  In fact, tomorrow I hope to travel to Clinton, IA with my wife for some bicycling and, of course, some train watching.  I need to take some pictures for an article I am writing for Model Railroad Planning.  The article is written, I just need some pictures and I'll be all set.


BRIDGE TRACK!!!!

The bridge is in its final position and finally has the bridge track installed.  I think its ready for traffic!  Will shoot some more pictures later with trains and maybe even some video.  Still have to install the mirror where the river hits the backdrop and add the highway and highway bridge.  Also need to pour the river.  Probably will do the river pour and mirror this weekend and take a break before I start on the highway.  Stay tuned and click on some ads. The extra money will help me pay for all this.

Rock River Crossing comes to Life

Painted the plaster landforms and added ground foam vegetation. Looks like a very muddy river right now, but that will change shortly.

Tuesday, June 8, 2010

Plastered on the Rock River

Plaster has been applied and is ready for painting.  Also painted the track which will be masked before painting and ground foam application. Video is just for fun.


Sunday, June 6, 2010

Old Fashion Screen Wire for Landform

It's really old fashion, but its what I know, so screen wire it is.   I've used plaster over aluminum screen wire for scenery since the 70s for every layout I've ever built.  I've gotten pretty good using a scissors and x-acto knife to cut and a staple gun to attach the screen wire.  The general method is to lay the screen wire over the opening, cut the screen wire with the scissors with about a 1 inch overlap, attach the screen wire with a staple gun  and then trim the excess with the x-acto knife.  Works pretty swift and goes quickly.  Took just a about an hour and a half to complete this first section. While laying out the bridges over the layout, I noticed that the river is not level, buts slopes down right to left.  This will be a problem when I use the Envirotex clear coat for the river as it will all flow to the left before it dries.  I think I will need to lay screen wire over the riverbed and use plaster to level out the riverbed.  Could be interesting.  Stay tuned.

Friday, June 4, 2010

Rock River Bridge Area Ready for Landforms

I'm making progress on the Rock River crossing area. It's just about ready for attaching the screenwire and plaster landform.  I installed a roadbed for Hwy 38 which runs along the UP mainline. A Hwy overpass will be used to hide the tracks coming through the backdrop just west of the Rock River bridge.  I decided to paint the bridges a rusting, faded black.  While silver or some other lighter color might have showed the detail better, most railroad bridges around this part of the country seem to be painted black.  The highway bridge accross the river will be simple bridge like the prototype pictured below.  A mirror will be installed under the bridge so that the river will appear to continue under the bridge. 


Tuesday, June 1, 2010

Bridges!! (or finally something other than turnouts)

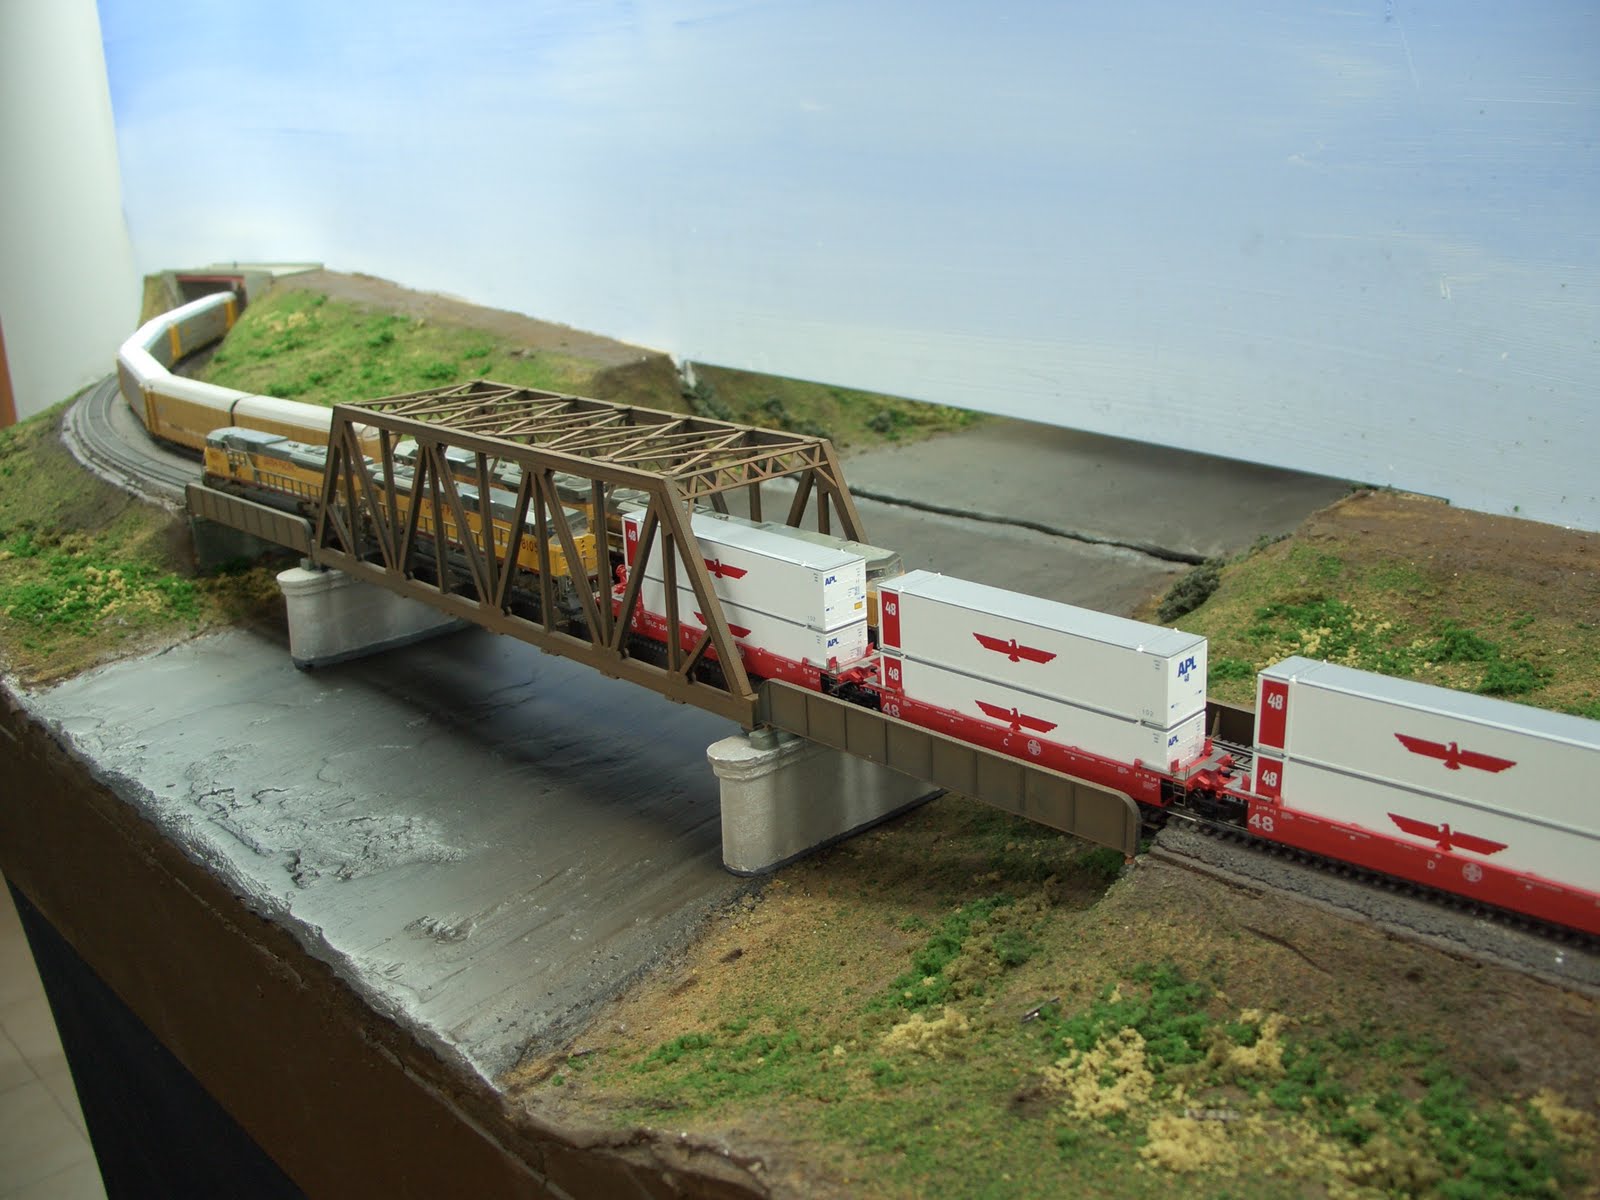
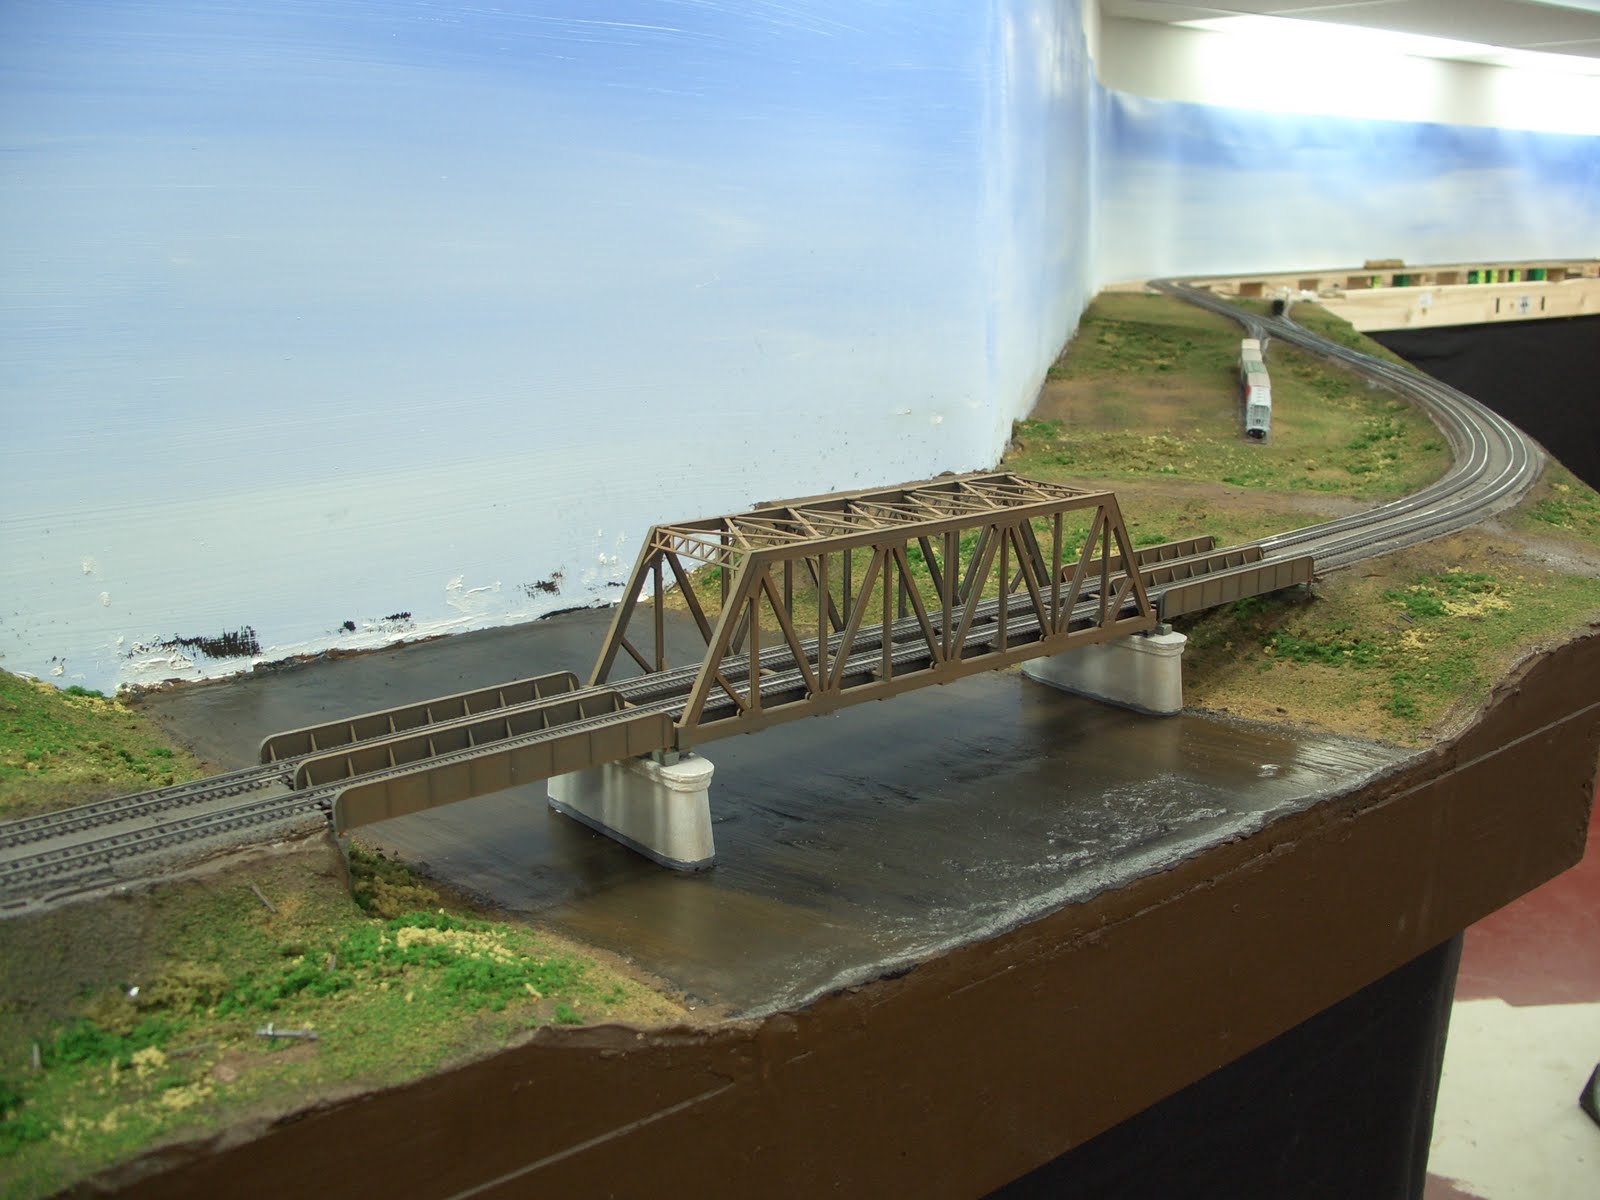
Here's some quick photos of bridges I built for the Rock River crossing just west of Franklin Grove.  It really is fun to do something other than turnouts for a change.  The through truss bridge is a kit from Walthers while the two girder bridges are from Atlas.  Both are excellent kits.  The through truss bridge from Walthers took a lot more time, but everthing fit together quite well and it was enjoyable to build.  You can't see it in the picture, but the rivet detail is very good.  Its a real nice model.  The two Atlas bridges went together in a snap, literally.  No glue was needed as the kit snaps together.  Took about ten minutes each.  The Atlas bridges come with track, but I will not be using them since I will be using one single piece of Micro Engineering bridge track for each of the mainlines.  This will keep the guard rails continous as well instead of part brown plactic guard rails for the atlas bridges and nickel silver guard rails for the truss bridge. 

The two piers are from Chooch Enterprises.

As you can see I just have the bridges sitting on top of the track for now, just to get an idea of how the scene will look.    I have not decided for certain on the colors to paint the bridges.  I'm leaning toward weathered black with a touch of rust for all three, but might consider silver as well.  Any opinion out there on color?